Wednesday, March 14, 2012

Eat All the Cookies


Chocolate.  I do not like chocolate.  Yes, I realize that this is against the rules of human nature.  I'm sure that my consummate dislike breaks several laws.  And yet...I can't get past it!  However, since I'm attempting to stretch my horizons and try new things I've been exploring ways to make chocolate palatable.  This is great news for A-chan who at seven years old still manages to be shocked at every major holiday when I refuse to share chocolate treats with her.

Ahhh, but there is indeed light at the end of the tunnel for I have discovered - orange flavored chocolate!

This gastronomic delight fools even my picky taste buds into believing that chocolate is yummy.  Since making this discovery I've been pairing the two in different concoctions to find one that is tasty but also simple to make.  These cookies are it!  Few ingredients are needed, very little prep time is involved and they come out perfect every time.  In fact, they are so easy that A-chan made a batch all by herself yesterday.  (Except for dealing with the hot cookie sheet coming out of the oven.)


Ingredients:

Part 1:
1/2 cup Sugar
1/4 cup + 1 TB Light Brown Sugar
3/4 cups Butter, melted
1 Egg

Part 2:
1 1/2 cup All Purpose Flour
1/4 cup Cocoa Powder
1/2 tsp Baking Soda
1/4 tsp Salt

Part 3:
1 tsp Orange Extract
1- 2 tsp Orange Zest
1/4 to 1/2 cup Milk Chocolate Chips

Directions:
1. Combine all ingredients for Part 1 into a bowl.  Stir well.
2. Combine all of the Part 2 ingredients in a separate bowl.  Mix together.
3. Add Part 1 mixture to the Part 2 mixture.
4. Now put in the Orange Extract and Zest.  Stir well, making sure that all the flour is incorporated.
5. Pour in the Chocolate Chips and stir to distribute.
6. The dough will be soft, reminiscent of brownies.  Use two spoons to put scoops of dough onto an    
    ungreased, non-stick cookie sheet.  Leave 1-2 inches between cookies!
7. Bake in a 350 degree oven for 7 minutes.
8.  Devour!

Notes:
- A-chan likes more chocolate chips than I do, for obvious reasons, so she added another 1/4 cup of chips when she made her batch.

- If you don't have an actual orange or a zester on hand, but happen to have Orange Extract just add 2 tsp of Extract to get approximately the same orange flavor.

Saturday, March 3, 2012

Japanese Curry Delivery Devices


If you aren't already aware of my obsession with Japanese curry, you're about to find out.  It is one of the best foods on this planet.  Curry is possibly the greatest invention that humankind has produced.  Usually cradled by a nest of rice, it is filled with vegetables and tofu, spices and love.  But then, sometimes we run out of rice. Instead of giving up and crying, I've been exploring alternative curry delivery methods.  Here are two of my new favorites.  I definitely recommend trying them.  Not only are they very yummy, but anything is better than wasted curry leftovers.  

Up top is a Japanese curry sandwich.  The first step was to melt some ghee to spread onto the insides of my sandwich bun.  Then they were lightly toasted under the broiler.  This delicious and decadent technique I learned in India and while I don't use it often, I'm in heaven when I do.  If you don't happen to have ghee handy regular butter will work just as well.  Next I piled on the curry, making sure to leave most of the gravy behind.  While I do love the gravy profoundly, it can get extremely messy in a hurry!  I then put a perilla leaf on top and got ready to munch!

Below is another method using Udon noodles for the carbohydrates.  I'm a big fan of this method and unlike the sandwich, am totally okay with the messiness inherent in this dish.  The gravy gets all over the noodles and makes them so yummy.  It's rather fun to slurp them and a challenge to eat them with chopsticks!  It's also very simple - the udon noodles were boiled according to the normal noodle procedure, then chilled with a rinse of cold water.  The currry was loaded on top with a garnish of cherry tomato and a perilla leaf.  


If you've never tried Japanese curry, it's pretty easy to make and absolutely worth the time to learn!  Here is a link to my basic Japanese curry recipe.  My recipe is vegetarian of course, but the dish is usually made with meat so feel free to replace the tofu with chicken, beef or pork.  The version shown in the dishes above had zucchini added for some extra nutritional punch.


Wednesday, February 8, 2012

Luxuriate in Couscous


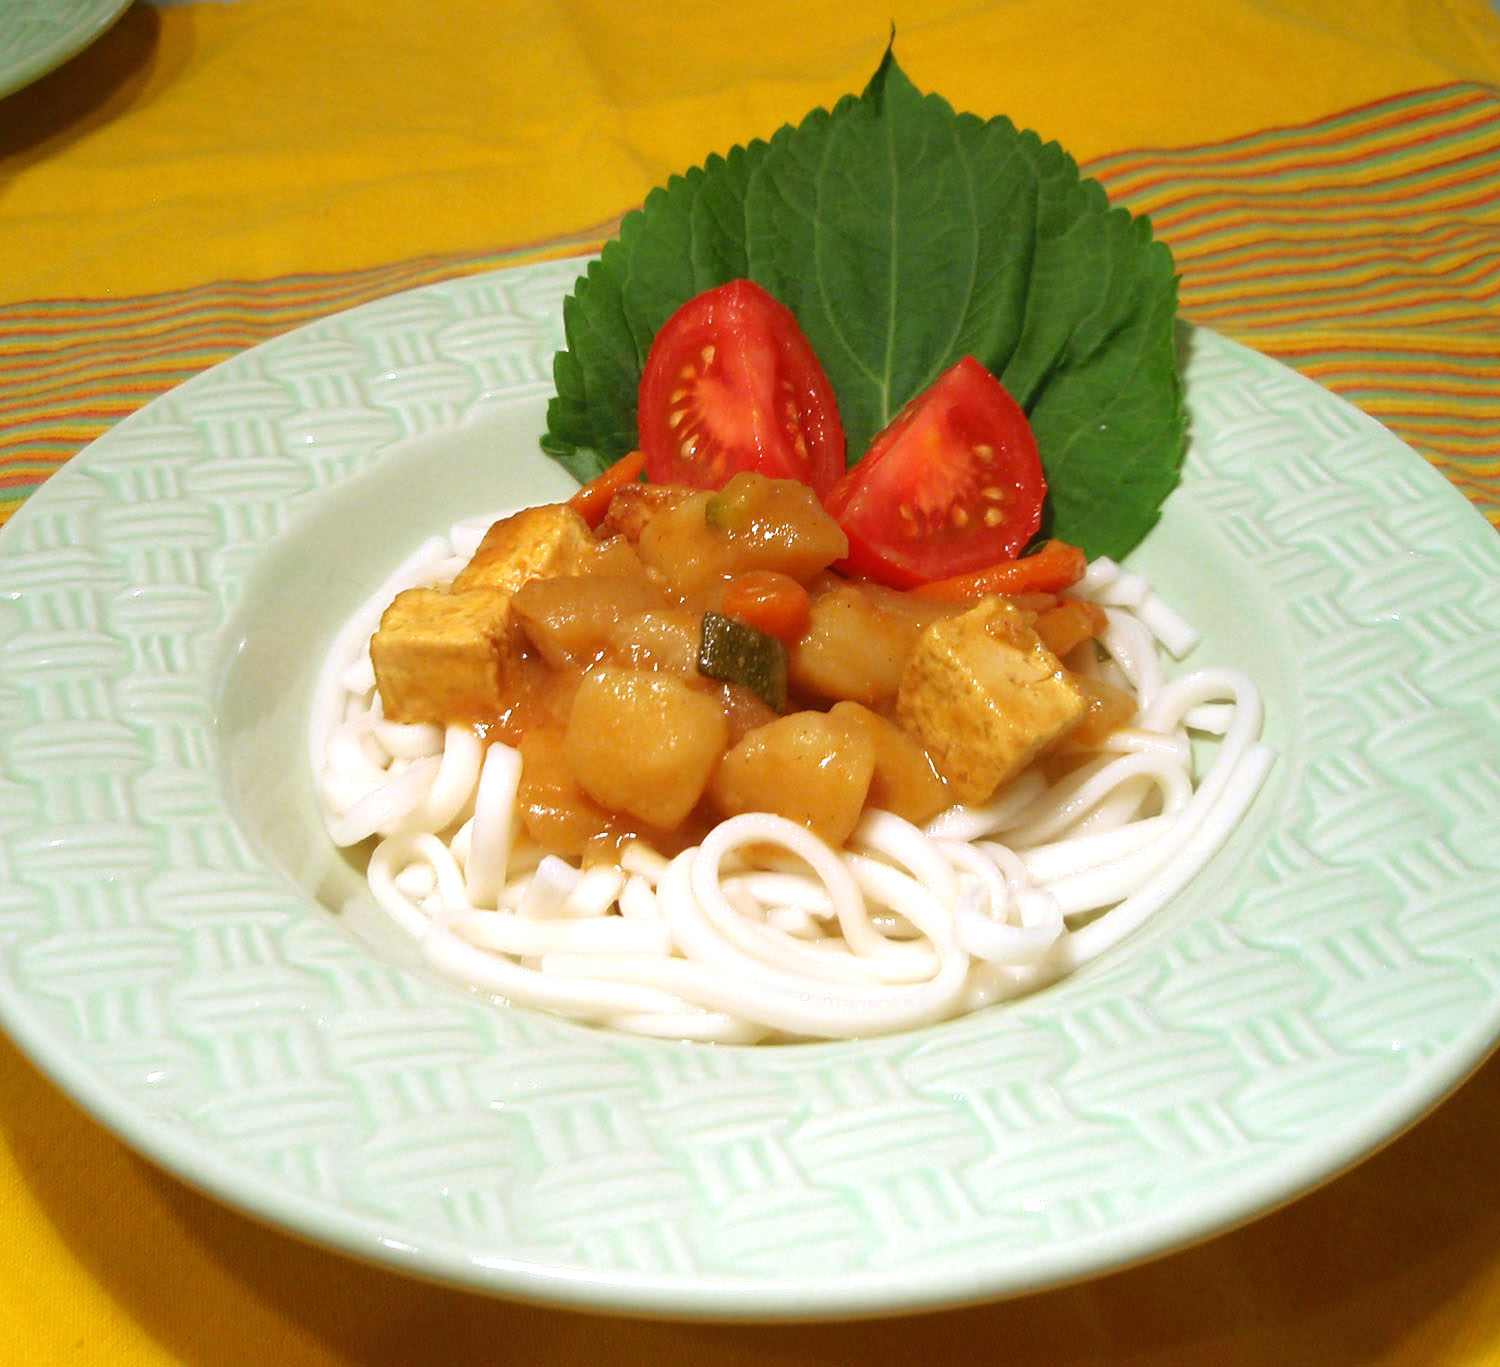
Couscous is considered a must have staple in our house.  It is easy to cook, easy to eat and can be flavored in a myriad of ways.  Years ago I cooked Moroccan recipes frequently.  In recent times, however, I've let some of my favorite cuisines slide into a black hole.  Not long ago a fellow bento-loving friend asked me a question about couscous and sparked a desire to return to the luxurious couscous recipes of former days.  And so...I present Garlic and Basil Couscous, Moroccan vegetable stew and Moroccan Flavored Tofu with Gravy.

Couscous takes flavors easily.  I've never had bad couscous!  This is my basic couscous flavoring recipe that  is engraved upon my brain and I make almost weekly.  You can get the flavored boxes of couscous at the store, of course, but where's the fun in that?

Ingredients:
1 box Plain (unflavored) couscous
4 TB Extra Virgin Olive Oil
2 TB Butter
2-4 TB Minced Garlic
1-3 TB Fresh or dried Basil
2 tsp Salt

1. Heat olive oil and butter in a small pan over medium heat until the butter is fully melted.
2. Cook the Minced Garlic in the oil and butter mixture, stirring, for about 2 minutes.
3. Add the Basil and Salt. Continue stirring and let everything cook together until the minced garlic is a lovely golden color, usually another 2-3 minutes.
4. Prepare the couscous as instructed on the box, bag, etc.  When you get to the point where you are instructed to cover and let sit for several minutes - add the olive oil, garlic, basil mix and stir in - then continue with the original instructions.

Notes:
- The range of tablespoons for the garlic and basil is because not everyone loves garlic as much as I do.  If you like a lot of garlic flavor, you can even add more but you might want to start out slow.

- As always, I am believe in the Availability Principle of cooking.  If I have fresh Basil I definitely use it but it's much more likely that I will have dried on hand.  This particular time I used dried.  The same goes for the minced garlic, although I hate dealing with actual garlic cloves so I prefer using the jarred version.

- Beware of overcooking the garlic!  If  it turns golden faster than the time listed above, go ahead and take it off the heat.  It will continue to cook a little after removing it from the heat because it will still be in the hot oil and butter.  If you cook the garlic to the brown stage there is a danger of having it end up like tiny rocks in your couscous - definitely something to be avoided!


The vegetable stew is very flexible.  Most veggies work well in it.  It carries a punch of flavor with the side effect of a wonderful aroma that fills your house and might even be sniffed in your fridge if you have leftovers.  I usually prefer to reduce most of the liquid out, but you can alter it towards either wetter or drier.

Ingredients:
2 TB Olive Oil
3 TB Minced Garlic
1/2 Onion, chopped
1 can Chickpeas, drained
2 Potatoes, peeled and chopped
1 1/2 Cups Vegetable Broth
2 Tomatoes, chopped
1/2 cups Water
1 Carrot
1/2 Zucchini
1 Yellow Squash

2 TB Fresh or dried Parsley
2 TB Fresh or dried Cilantro
2 tsp Salt
1/2 tsp Ground Cardamom
1 TB Ground Cumin
1/2 tsp Ground Turmeric
1 tsp Ground Ginger

1. Chop the Onion, tomatoes and potatoes into 1/2 inch pieces.  Chop the carrots, zucchini and squash into  
    1 1/2 inch long slices.
2.  Heat the oil in a large pot over medium heat.
3. Cook the minced garlic and onion for 2 minutes, then remove from the pan.
4. Put in the tomatoes, vegetable broth, water, potatoes and chickpeas.  Simmer for 10 minutes.
5. Add the onion and garlic back to the pot along with the parsley, cilantro, salt, cumin, turmeric and ginger.
    Turn heat down and simmer uncovered for another 10 minutes.
6. Next put the carrot, zucchini and squash into the pot to cook with the potatoes and chickpeas.  If the
    liquid is low at this point you can add more vegetable broth or water.
7. Continue to simmer on medium heat for 10 minutes.  Remove 1/4 cup liquid from the pot and set aside for
    the Tofu Gravy.
8. Check to see if the chickpeas and potatoes are tender.  If so, remove from heat and serve over couscous.  
    If not, keep simmering on low heat until they are tender.

Notes:
- I slice the carrots, etc. lengthwise because I like to have different textures in my vegetable stew.  You can chop or slice the veggies any way you like instead of doing some chopped and some sliced.

-This type of dish would normally have some cayenne added along with the other spices.  Since I was making it as a family dish I did not add the cayenne.  However, since I love hot and spicy food I sprinkled (okay, okay - poured) ground cayenne over my stew before consuming.


I'm never sure whether to call this a cream sauce or a gravy.  I make it very thick so I tend to lean towards gravy.  No matter what you call it, this stuff is full of flavor and makes a yummy companion to the tofu and couscous!  I flavor the tofu very lightly so that it doesn't start a fight with the gravy flavor.

Ingredients:
1/2 package extra firm Tofu
2 TB Extra Virgin Olive Oil
1/2 TB Butter
Salt
Ground Cumin

1/4 cup liquid reserved from the Morrocan veggie stew (above)
2 TB Butter
4-6 TB Heavy Whipping Cream
4-6 TB All Purpose Flour

1. Slice the tofu into squares, lay the squares out on paper towels.  Cover with more paper towels and lightly
    press to squeeze out the excess liquid.
2. Heat the olive oil and butter in a pan on medium heat.
3. Sprinkle cumin and salt to taste on the fronts and backs of the tofu slices.
4. Lightly pan sear the tofu in the olive oil and butter mixture until the fronts and back of the slices are
    golden.
5. Remove the tofu from the pan.
6. Add the 2 TB Butter to the pan and let melt. Then add the Stew liquid.
7. Slowly add Whipping Cream and Flour 1 TB at a time, continuously stirring.  If you like a thinner sauce,
    use less flour.  For a heartier gravy use more flour.
8. Pour or spoon over tofu slices and couscous.

Notes:
- If you don't want to make the Vegetable Stew, you can use Vegetable broth to make the gravy.  In order to the get the right flavor, add some garlic, cumin, turmeric and cilantro.

- When I'm cooking the gravy I usually stir with a whisk - it works much better than a spoon and it is fun!


Friday, January 27, 2012

Pastitsio Saves the Day


Despite being allergic to over half of the recipes in my Greek cookbooks, I happen to adore Greek food.  That conflict has led to a range of culinary substitutions of mammoth proportions.  One of the few recipes where I don't have to change ingredients because of allergy issues is Pastitsio.  But I still needed to make it vegetarian.  Thanks to the variety of soy based meat substitutes available, this was incredibly easy.

Pastitsio is basically a casserole with pasta, meat sauce, cream sauce and a cheese topping.  The original recipe that I adapted contains eggs in the cream sauce.  I, however, am a horribly suspicious person when it comes to eggs.  When cooking the original recipe I was always worried that the eggs hadn't cooked enough, so to save my peace of mind I just completely left them out of my vegetarian redaction.  My favorite part of this dish is the crispy topping of Parmesan cheese.

This is the first time I've gotten to use the beautiful casserole dish that my husband gave me for Christmas.  Isn't it lovely?  I fell in love with it the moment that I saw it in the antique store.  Can you believe it - this fabulous dish is from the 70s, according to the store tag.   There is not even a scratch on it.  I nearly gibbered in delight and begged him to get it for me.  I was so happy when I opened it up on Christmas morning!

Vegetarian Pastitsio Recipe:  Adapted from the Pastitso Recipe in The Complete Middle East Cookbook by Tess Mallos

Base Ingredients:
4 oz. Macaroni noodles
2 TB Butter
1/4 cup Parmesan cheese, grated
1 tsp ground nutmeg
salt and pepper to taste


Fake Meatsauce:
1 TB Olive oil
1 TB butter
2 TB minced garlic
1 large Onion, chopped
1 pkg. Morningstar Farms Recipe Crumbles
1 tsp soy sauce
1/4 cup chopped tomatoes
1/2 cup red wine
1/2 cup vegetable stock
3 TB dried or fresh parsley
1 tsp ground cardamom
2 tsp ground cumin
1 TB garlic powder
1 tsp nutmeg

Cream Sauce:
3 TB butter
1/2 to 3/4 cup milk
4 TB all purpose flour
1/2 cup parmesan cheese, grated
1 tsp nutmeg


Part 1: The Base
1. Boil the noodles, drain and place in casserole dish.
2. Add the butter in slices to the hot noodles and stir until melted.
3. Mix in parmesan, salt, pepper and nutmeg.

Part 2: Fake Meatsauce
1. Heat olive oil and butter in skillet, saute the minced garlic for 2 mins.
2. Add onions to the pan with the garlic and saute until clear then remove from pan.
3. Saute frozen Morningstar Farms crumbles with leftover olive oil in the pan and the soy sauce.
4. Add the vegetable stock, wine, herbs and spices, tomatoes, onions and garlic.  Stir well.
5. Cook on medium heat for about 20 minutes or until liquid is reduced away.
6. Mix the fake meatsauce into the noodles in the casserole dish, stirring until well distributed.

Part 3: Cream Sauce
1. Melt the butter in the same pan that held the meatsauce.
2. Add milk slowly, stirring constantly.
3. Add flour a little bit at a time, again keep stirring!
4. Slowly mix in the parmesan cheese and nutmeg.  Cook for just a few minutes until the cheese is all melted
    and the sauce is thickened.
5. Mix the cream sauce into the noodles and fake meat sauce.
6. Bake uncovered at 400 degrees for 30 minutes.
7. Cover with 1/2 to 1 cup of grated parmesan, cook for another 5 minutes.
8. Broil just enough to make parmesan topping golden brown

Tuesday, January 17, 2012

Make Spaghetti - Vegetarian Style


When I was a teenager this dish was the epitome of home cooking.  There was nothing on this planet better than Nanny's spaghetti.  I requested it every time we visited my grandparents.  It was a reward for the long drive, the twisting roads and the *shudder* 65 degree incline of the driveway to reach their mountain top hideaway.  That driveway still scares me into having nightmares before every trip, so having a warm, garlic infused delight for my taste buds was a darned good thing.

After a few years I had the idea that maybe I should learn to cook Nanny's spaghetti for myself.  Ahhhh, brilliant!  Just one problem - Nanny has never made spaghetti from a recipe so her instructions, "just add garlic until it looks right" and "cook it on the stove and you can smell when it's done" were frustrating.  I finally learned her 'recipe' by sitting on a stool in the kitchen and watching every movement with a hawk-like gaze, scribbling frantically in my notebook.

Then came the fateful day when I turned vegetarian.  But I couldn't give up Nanny's spaghetti and ended up altering the recipe.  It's still fantastic.  I still love it.  It's not exactly healthy, though, even if it is vegetarian!


Ingredients:

Olive oil
1 TB Minced garlic
1 onion, chopped
1 green pepper, chopped
1 pkg. Morningstar Farms Recipe Crumbles
1 TB Soy sauce
2 8 oz. cans Tomato Sauce
1/4 cup Chianti
2 TB Garlic powder
2 TB Basil
1 TB Oregano
3 TB Parsley
1/2 tsp Paprika
salt and pepper (to taste)
2 large tomatoes, chopped

1. Heat 1 1/2 TB Olive oil in a large stainless steel pan. Sautee minced garlic for 2 minutes.
2. Add chopped onions and green peppers to the pan, sautee on medium heat for 4 - 5 minutes.
3. Take the onions and peppers out of the pan and set aside.
4. Pour frozen Morningstar crumbles into the pan.  Add the soy sauce and another TB of olive oil.


5. Sautee the Morningstar Crumbles until thawed.
6. Put the onion and green peppers back into the pan with the crumbles along with 1 can of tomato sauce.
7. Mix together all of the spices and herbs in a bowl.  Add half of this mixture to the pan, stirring into the
    sauce.
8. Add the wine.
9. Simmer for 10 minutes on low heat, stirring frequently.


10. Add in the chopped tomatoes, 2nd can of tomato sauce and the rest of the herb mixture.


11. Simmer, again on low heat, for another 10 - 12 minutes.


Notes:

When cooking 'fake meat' remember not to overcook!  Most times it just needs to be heated through or thawed.

It's important to add oil to make up for the fat that is not present in soy meat products.  Nanny's original spaghetti sauce had a sheen to it from the fat in the ground beef.  If the sauce doesn't have that distinctive sheen to it I often add another 1-2 TB of Olive oil at the end.  Hence the maybe not so healthy part, lol.

Nanny used Worcestershire sauce but since it is not vegetarian, I use soy sauce instead.  When I have it available I use Ottogi steak sauce.

My style of cooking is to use whatever I have on hand.  If I have only dried herbs, that's what I use.  If I have fresh herbs already, I will use them.  Sometimes I use a mixture of the two - it just depends on what I have on hand.  In this particular version I used fresh Oregano but everything else was dried.

We prefer Dubliner cheese to go with our Spaghetti.  It has a similar texture and taste to Parmesan with a little more tang to it. Dubliner is what you see topping the dish above.

Nanny used to say that her Spaghetti sauce bore no resemblance to anything found in real Italian cooking.  Not knowing much about Italian cooking, I can't say.  But it is delightful, warming and comforting!

Friday, January 13, 2012

Make Snowmen Cookies!


One of my absolute favorite things about the holidays is making cookies with my daughter.  These are obviously from a while back.  I'm only just now getting the time and energy to post about them.  Ah well, better late than never!  It's very difficult for me to let go of my natural inclination towards wanting everything to be perfect.  So letting A-chan help with cookies is so hard.  And yet I love to spend time with her and teach her new things.  I need to relax and learn that the sky will not fall if the kitchen gets a little messy!


We started out with a basic sugar cookie base.  My favorite technique tip for rolling out the dough is to freeze the portion I'm going to be working for a couple of minutes.  That helps it keep from getting too soft and gooey.  If it still gets too soft after it's rolled out, I use my ultra secret technique.  I slide the parchment paper with the rolled out dough onto a small cookie sheet and pop it in the freezer again.  Only for a few minutes though - I just want it to chill slightly so I can cut and separate the cookies from the rolled dough.  I rolled and cut the circles.  A-chan rolled up small balls of the leftover dough and smooshed them into place on the circles.


After the cookies cooled we placed them on another sheet of parchment paper and commenced with the fun part - Sugar galore!  We smoothed on the white icing then quickly sprinkled the colored sugar and placed the miniature chocolate chip eyes before the icing hardened.  After that layer was completely set and hardened I used henna cones filled with icing to finish the decoration.  White icing was layed down in a squiggly pattern for the hat brim and then taken up to finish off the poofball with a swirl.  Chocolate infused icing made the dots for the mouths and orange icing became tiny noses.  We used a little less icing for the cookies that she was taking to school because I was honestly afraid of running out after making 64 cookies!


The cookies above are all packed up and ready to travel to the school party.  The ones down below were the ones that A-chan decorated completely on her own, including doing her own piping!  She added in some extra icing here and there because just like her mama, she is an icing girl.


Saturday, December 10, 2011

Color Some Thanksgiving Napkins


Okay, okay...so I was intending to put up a recipe of some kind, at least something food related.  But here is another craft instead.  *Sigh*  It's all because of the root canal, you see.  Food and I aren't getting along well at the moment.  So I decided to focus on the napkins and napkin rings that we made for Thanksgiving.  

What I wanted most for Thanksgiving was a fun, relaxed atmosphere.  Instead of getting fancy we made a lot of decorations for our table.  It was a nice way to spend time together.

These napkins and napkin rings are simple and require few tools:  

Large kitchen cloths, plain white
Masking tape
Fabric markers
Wax paper
An old wool sweater
Acorns
Hot glue gun


The first part of our fall themed napkins was to cut the large kitchen towels into four pieces.  I bought these at Target.  There were three of the huge cloths for $4.  That makes 12 squarish napkins.  The two unfinished edges need to be hemmed, but the best part is that the other two are already hemmed for you!  


We cut strips of masking tape to mark out our lines across the napkins.  If you want to get precise dimensions you can measure off equal placings for the tape.  I let A-chan eye her spacing instead, which made for a more organic effect. To protect the table from any possible marker related mishaps we put sheets of wax paper under the napkins before we commenced coloring.  She had a great time coloring between the pieces of tape!


As we removed the masking tape from the first set of lines we hooked all the strips onto the edge of the table so that we could reuse them going in the opposite direction.  We varied the spacing on the second go so that there was more texture to the finished napkin.  A-chan decided to do the second stripes in a rainbow pattern and see how the colors would all interact with the first orange and yellow stripes.


Here is a peek at some of our finished products.  They were very easy to make and also pretty stress-free!
  

My next goal was to make some napkin rings. Explaining napkin rings to my 7 year old was akin to teaching a cat to sing.  Our family is one that has perfected the art of casual eating.  A fully set table happens exactly twice a year.  She only understood the concept after a visit to Pier1 where I introduced her to dozens of beautiful renditions of napkin rings and their uses.  The phrase "make-up for the table" became part of our lexicon that day.


If you are lucky enough to have a 100% wool sweater at home that you never use and wouldn't mind cutting up, you're all set.  However, if you're like us, a trip to Goodwill was the ticket to felting goodness.  Important note: only 100% wool will do.  If there are other fibres in your sweater this will not work!  To felt the sweater we washed it in hot water and dried it on the hottest setting three times - you want it to shrink.  Originally it was a size that fit me but when we finished the felting process it was a perfect fit for A-chan. 


All that was needed to make the napkin ring base was to cut across the sleeve of the sweater, leaving a circle of felted fabric that was perfect for a napkin ring.  To add some extra autumnal cheer we took acorns that we had gathered a few days earlier and hot glued them to the napkin rings. In a matter of minutes they were all finished. A-chan was so proud to use the napkins she had made at our Thanksgiving table.  As an extra bonus these napkins can also go to school with her bento lunches!